Interested in night sky photography??? As one of the judges for the Astro Photography Prize Competition out of Australia I’ll be one of the panelists to get some feedback on your images before entering. We’ll be doing an Image Critique Session starting at 6:30PM to 8:30PDT – 9:30-11:30EDT. Even if you don’t have images to enter as yet you can tune in for the session and pick up some astro tips! There is no charge to enter images for review.
This is session one of two which will be held at different times and date before the opening for entries on June 15th 2026. Live online judging is the 12th through the 16th of August.
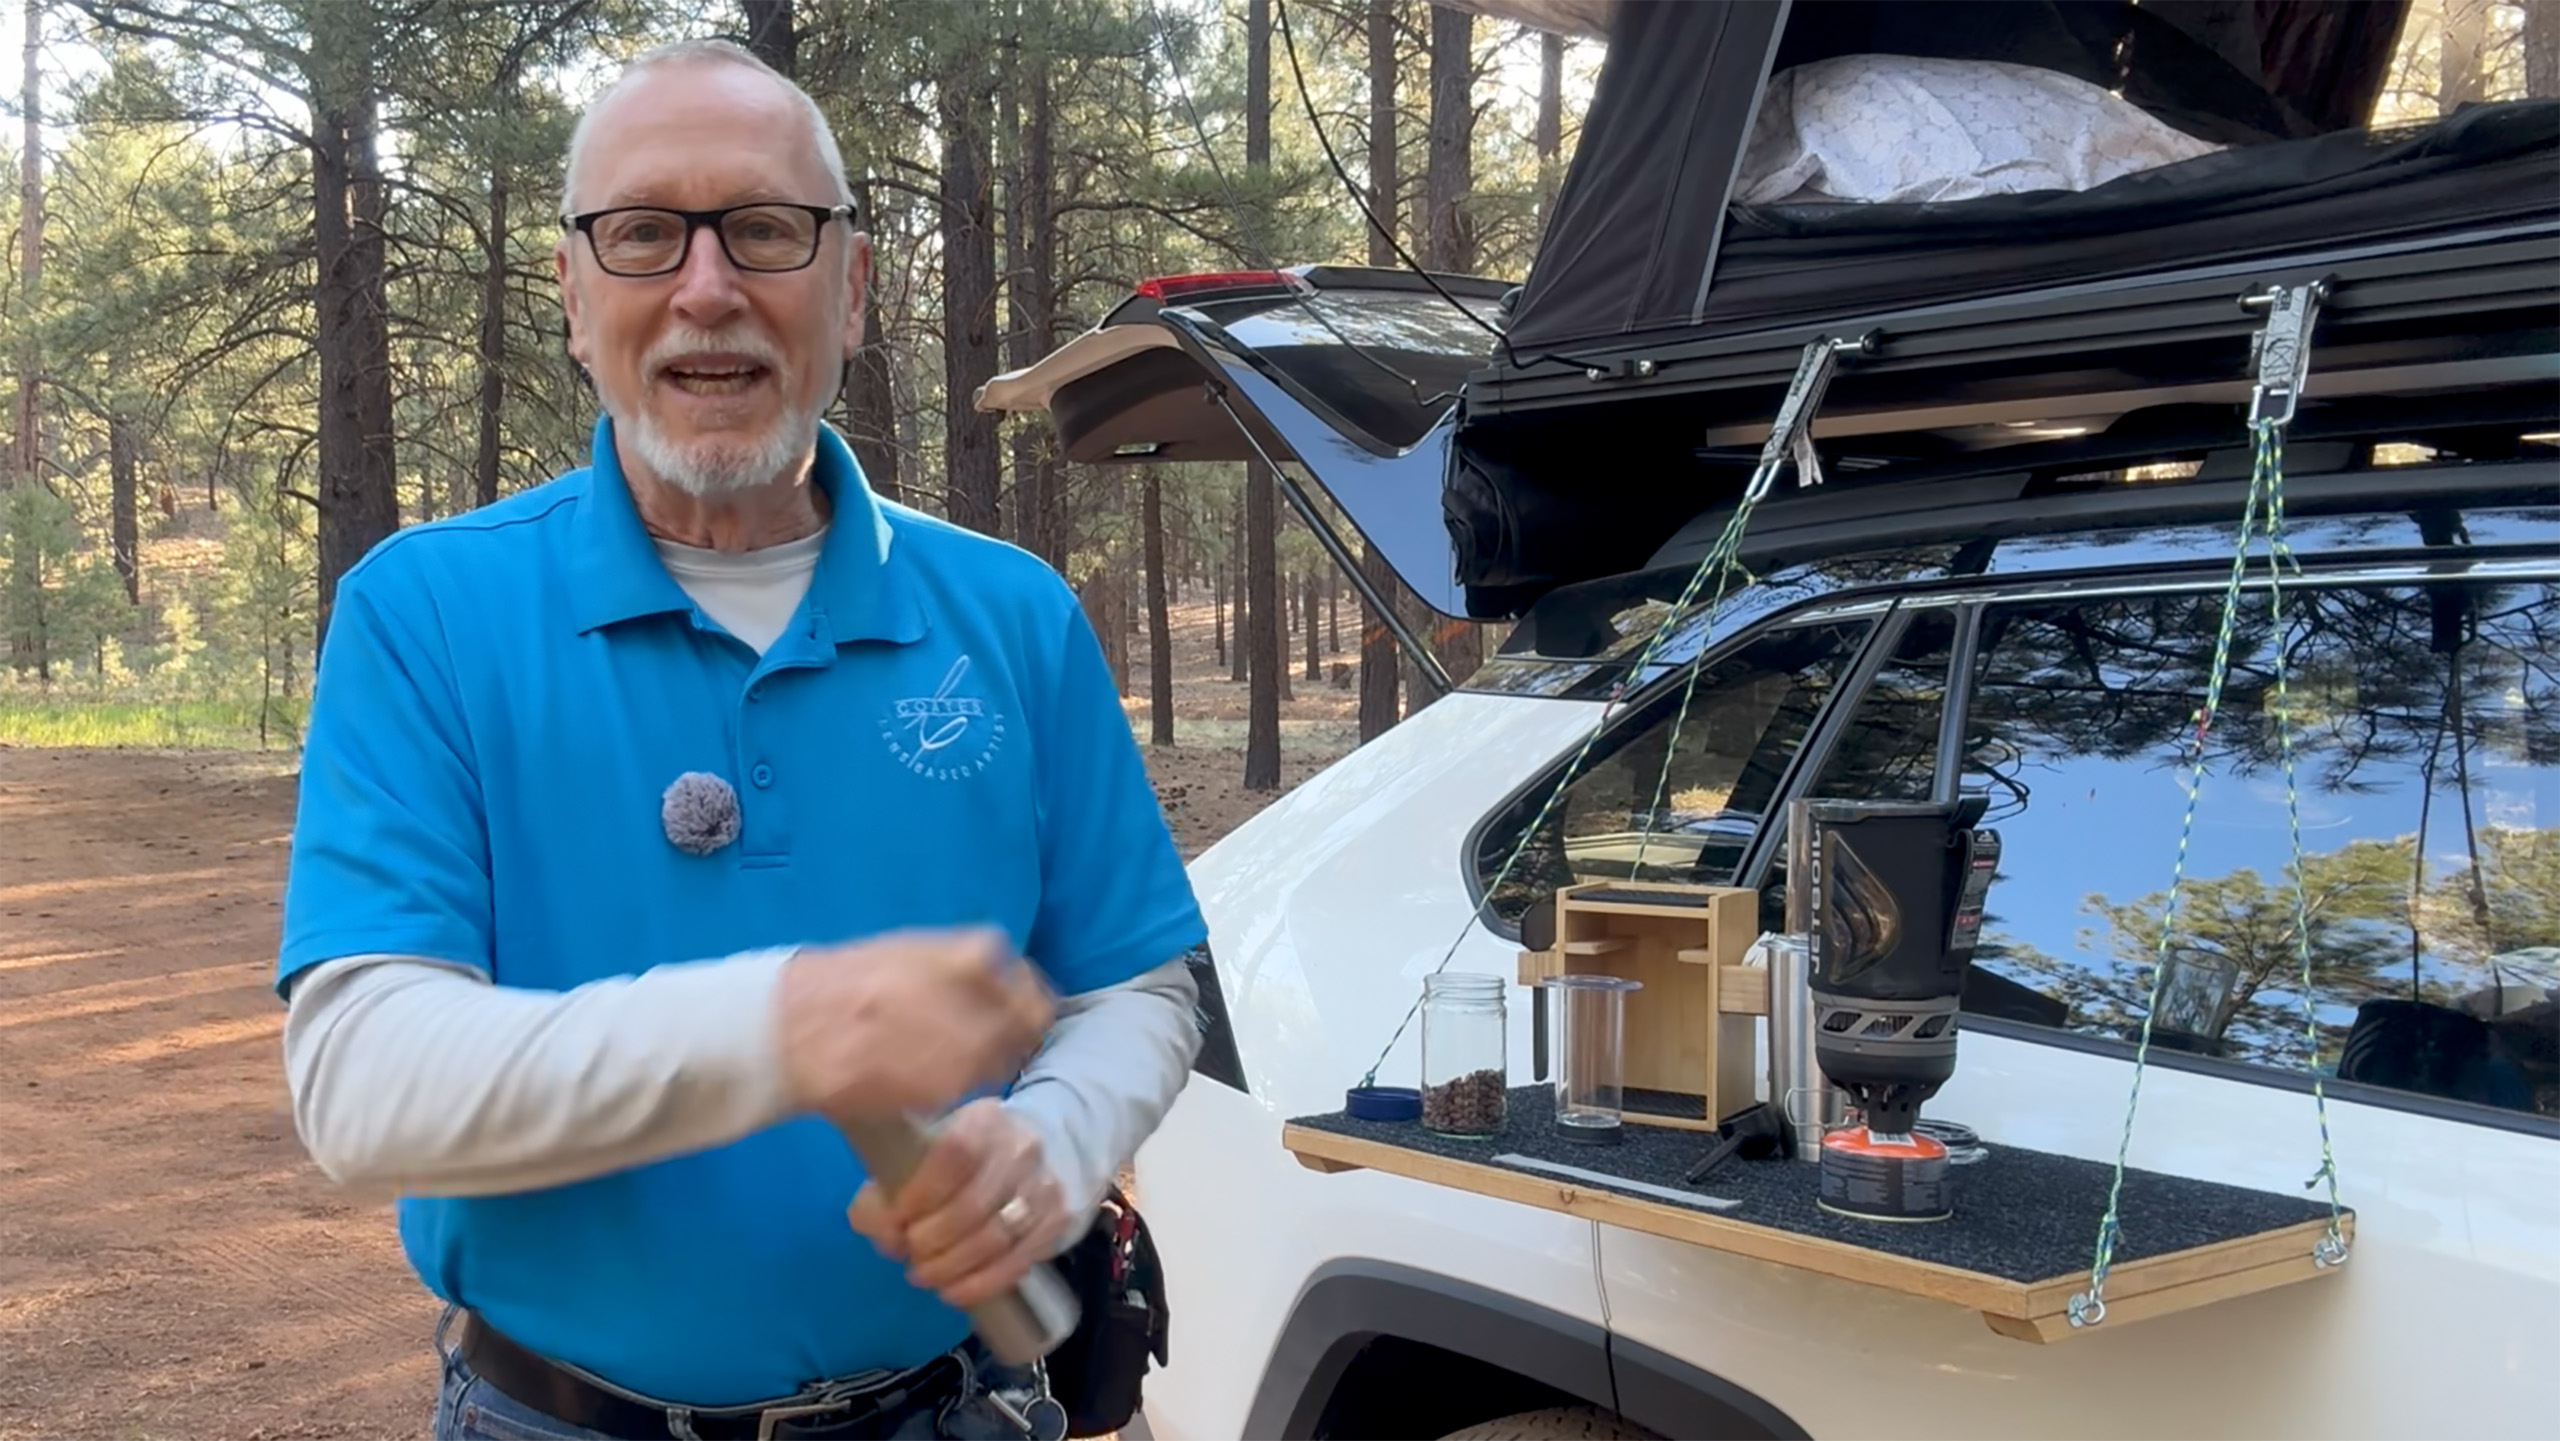
I am in the process of producing a video for PHOTOVISION Professional Photographer’s of America’s education website. My video is called Beyond the Horizon. It explores Boondocking, AKA Car Camping. Below are the plans for the most asked about build I put together. Having a table at a height which enables you to stand is a luxury in my opinion. If you agree and are a bit handy with some tools you can craft one inexpensively yourself.
In this article I’ll share my measurements and materials list to save you some time working it out for yourself.
Size Matters
Before you begin your gathering and construction you’ll want to look at how you will be using your table. I initially made mine to hold a two burner stove. Turns out that the table was just a wee bit too small for that. It was a squeeze after adding the propane cylinder which I failed to take into consideration. There turned out to be just a little less space for plates and bowls with the assembled stove aboard than I thought. Turns out that this is the perfect size for how I use it now. It’s not too big nor too small. Overall weight is a bit over three pounds.
My Table Uses
Preparing food is the main way I work with my set-up. There’s room for multiple plates and bowls. I currently use a Jet Boil unit to heat water for coffee and freeze dried meals when a want a hot meal. I find the freeze dried meals to be tasty enough and way less hassle than when I had the two burner propane stove. If you want to cook a bit more than I do you can make your measurements just a bit longer or use a single burner stove. The table is also helpful when working on various projects doing the day.
The Materials
If you have a circular saw or a table saw and a power drill you’ll be good to go for tools. If you are not quite so handy you can bring your measurements to the big box hardware store and they will cut your materials to size. Some include it as part of the service some may charge you a little for each cut.
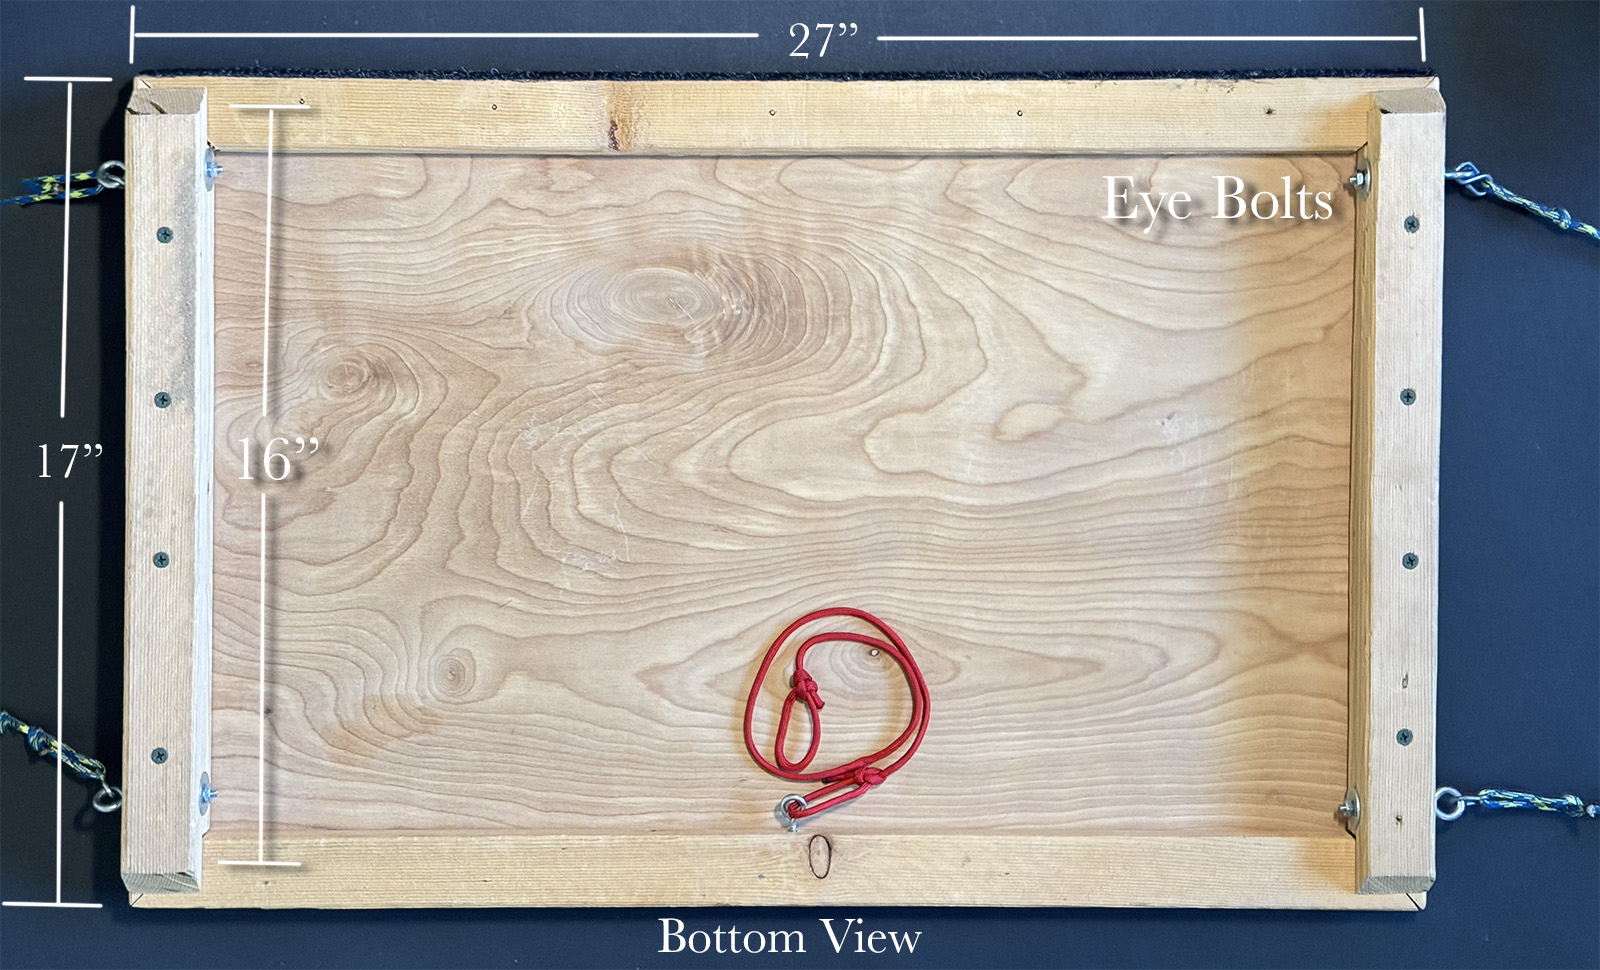
Bottom view. See text for instructions on size of screws and fasteners used in the project.
The top is 1/4 inch plywood, 17 X 27 inches. you can often check the scrap area and may be able to find a piece that fits your needs without having to buy a large sheet. Make sure you you get a quality piece of ply that is very flat. Oak Sanded Plywood in a 2 X 4 foot size can be purchased for around $25. To support and give the top strength I line the bottom with 1 X 2 inch Furring strip. Adding two more strips to the sides Get two 8 foot strips as they are under $2 a piece.
You’ll need 16 3/4 inch wood screw to secure the top. 8 1 1/2 inch screws for the side reinforcements. Four 2 1/2 inch by 1/8th inch eye bolts with nuts and eight washers. Four S hooks. Four Guyline tension hooks. 1 package of Guyline rope. (it’s good to have a lighter or match when you cut the lines to keep them from fraying) Two Velcro straps to attach to the roof rack. I found the Keeper Wrap-It-Up 1 inch X 6 inch Grey Bundling Strap at Ace Hardware.
Final touch is layering with carpet. I use a black/gray utility mat. A 24 X 60 inch goes for about $20Big box hardware stores sell this by the foot. I staple a layer on top. Also a strip across the back of the table on the edge that rests on the car.
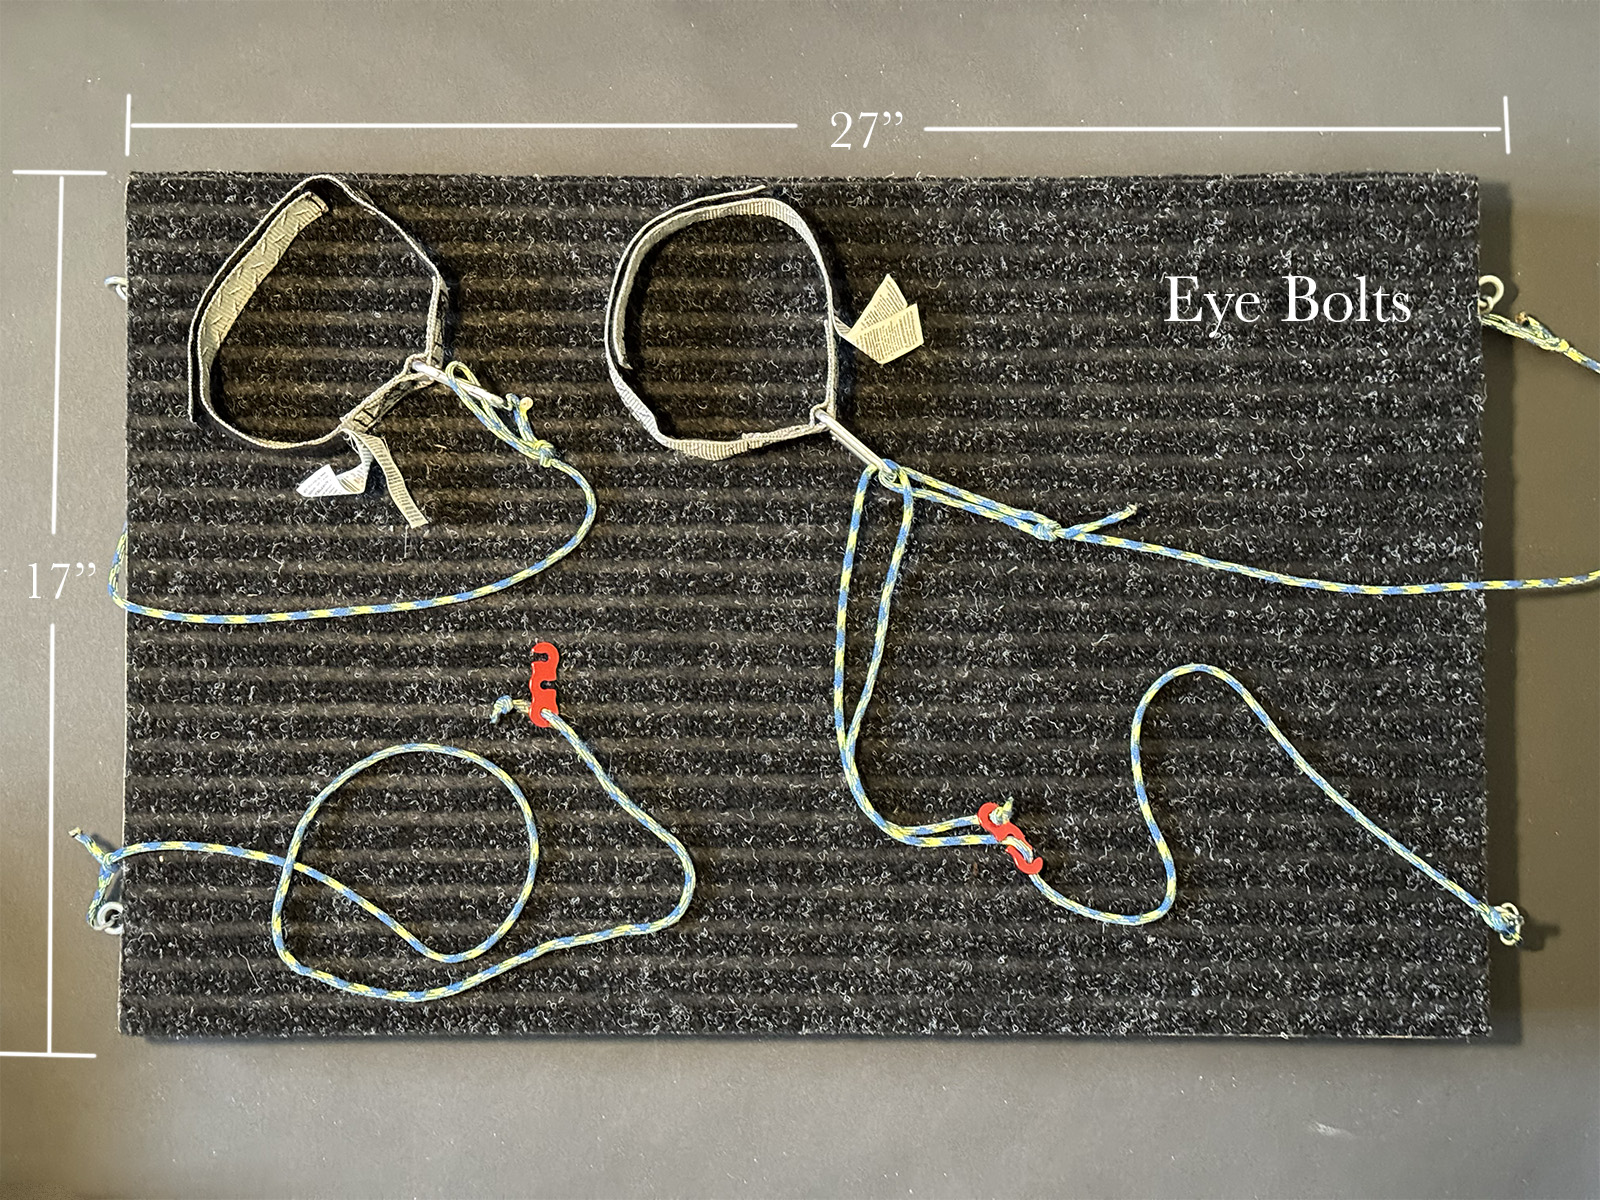
Top view with carpet stapled on place. There are four eye bolts to hold the lines. I use bowlines to attach the guylines. Strap have Velcro fasteners with a metal ring. The Velcro makes it easy to attach the table to the roof racks. The tension hooks allow you to adjust the table and keep it level.
When you enter images into the Merit Image Review at Professional Photographers of America (PPA) to earn photography degrees there are 12 elements which are looked for. One of those 12 elements is presentation. Not adding a presentation is a presentation choice. A better idea is to give your work a finished look. Think about an image that you have printed. It takes on a new life when it is matted and framed. That is the same idea behind the digital presentation techniques I share in this video.
I shared the way I work putting my presentations together in this video. If you have any questions don’t hesitate to give me a shout!
The light entry point (LEP), AKA nodal point, is an important part in getting high quality panorama photos. If you set your camera to be over the rotation of your camera your software will have a much easier time giving you a quality result. Here is a way to ensure you have found the LEP for your lens. Note that should you be working with a zoom lens you will want to find the LEP for a couple different spots on your lens. The LEP changes when you zoom in or out.
Light entry point
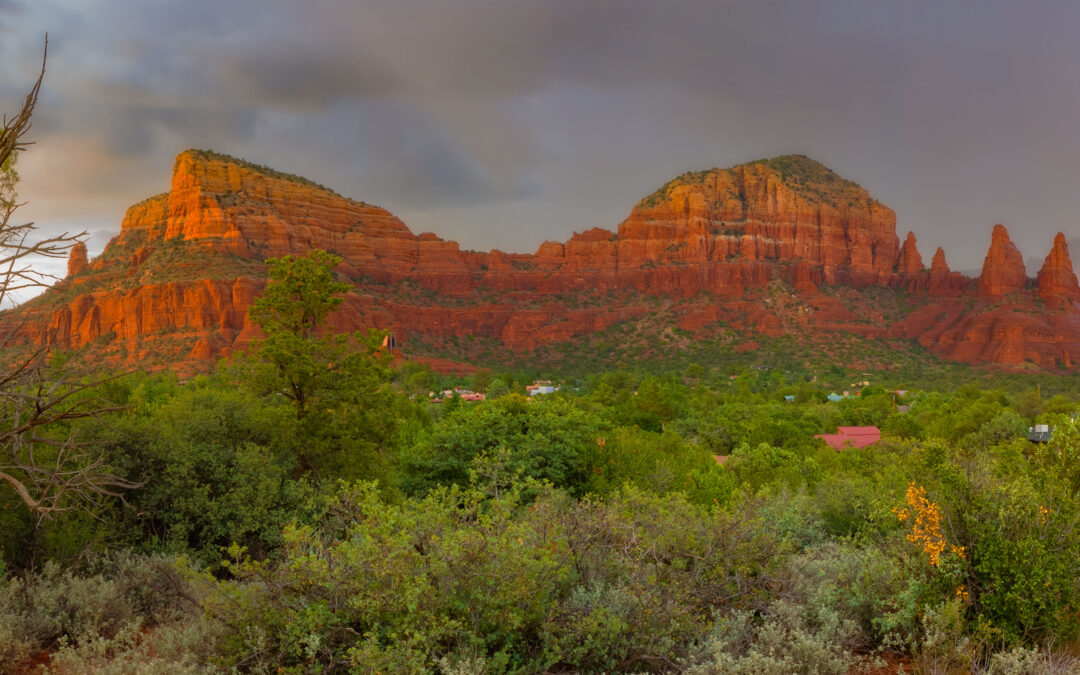
Light entry point, or entrance pupil, and where it is in relation to where the camera pivots, is the key to better panorama stitching. Panoramas can show your world in a creative way. Many times a pano tells the best story of your scene. Better results can be found using a couple things I’ll share in this article.
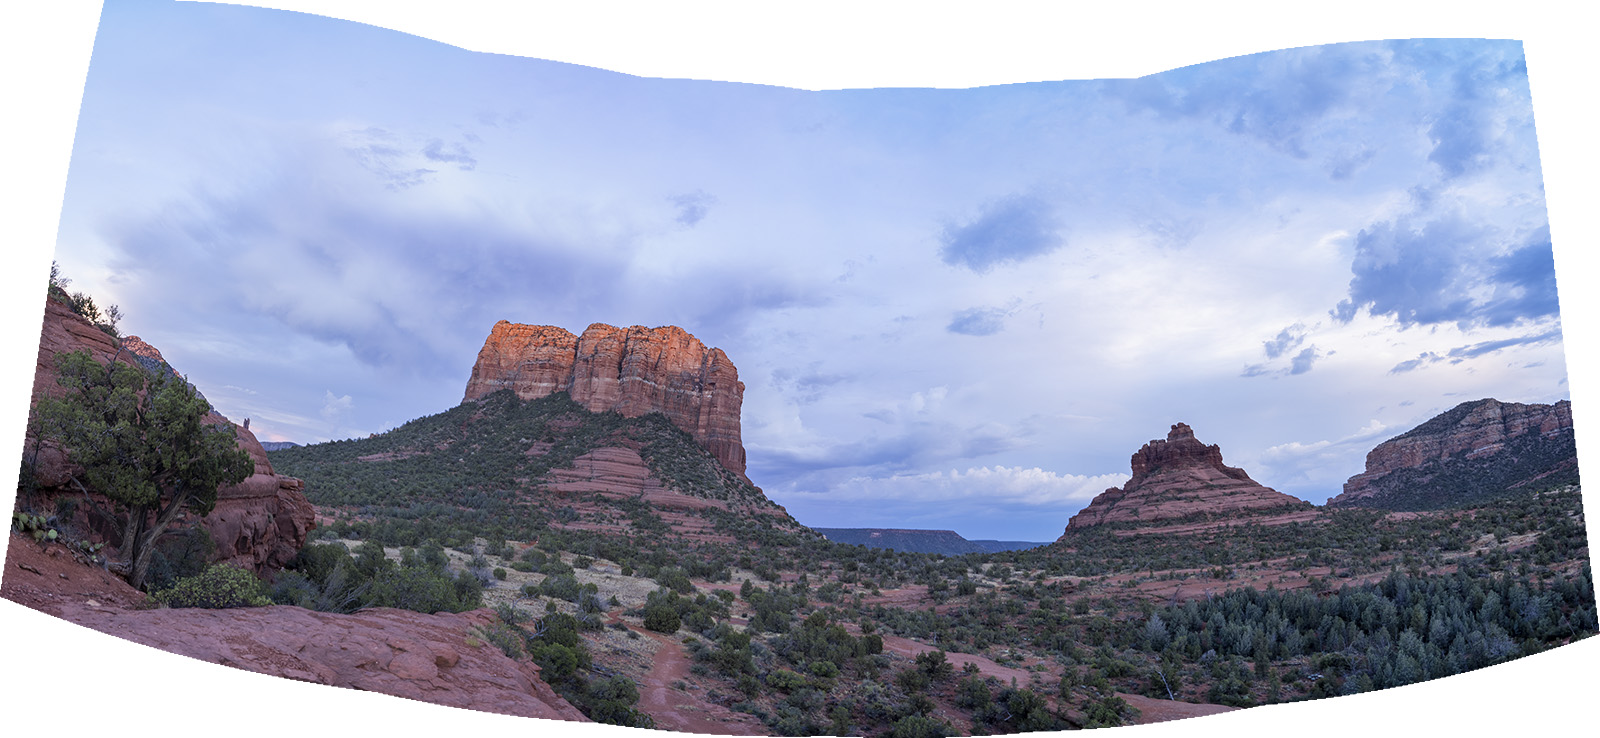
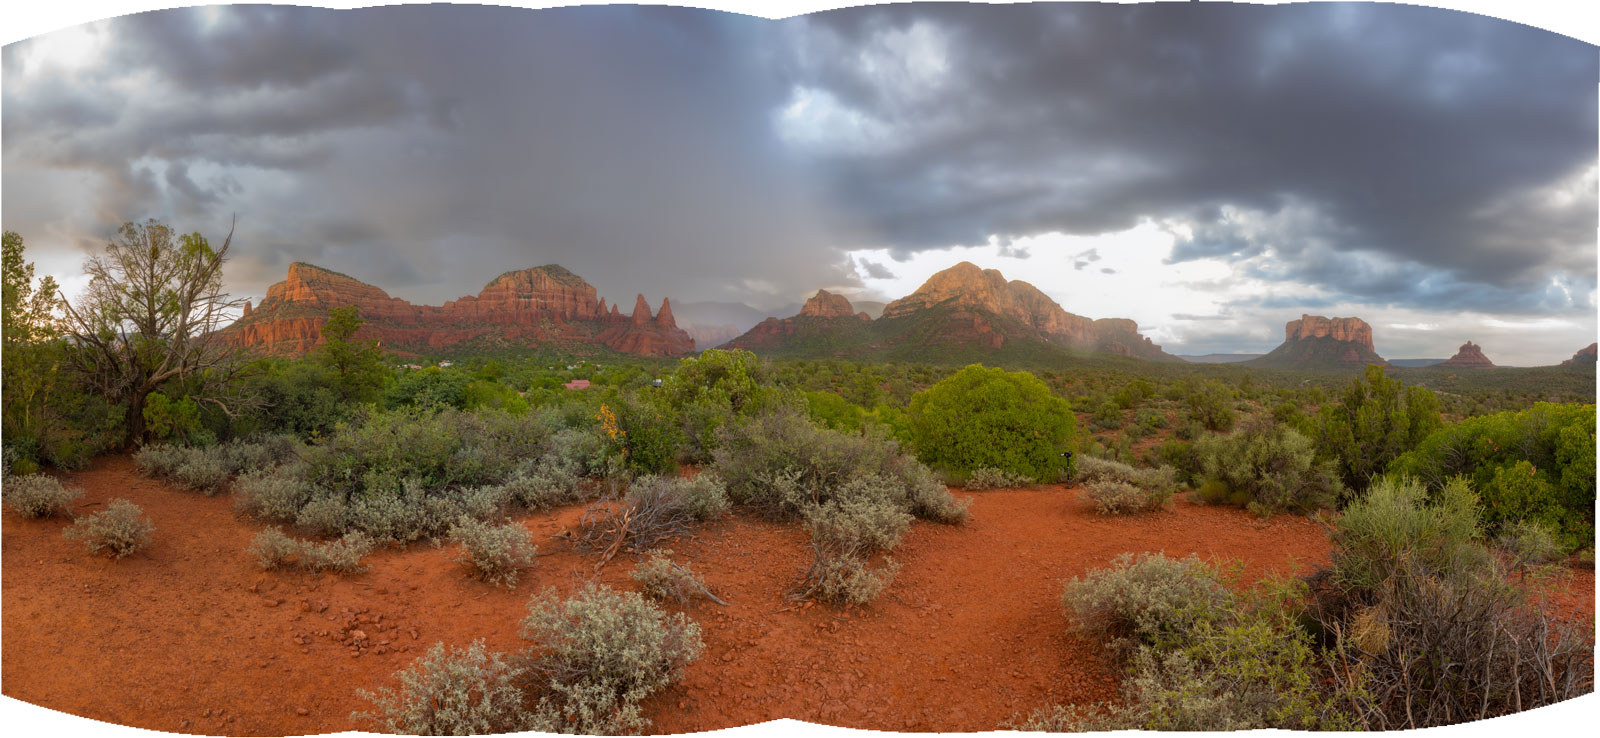
Results showing not using the light entry point to capture images. This is usable but needs lots of extra effort to correct the stitch.Result when the camera is level and the lens is over the Light Entry Point.
Let’s talk about why your panorama software might not render your stitching of images properly. Hold your thumb out in front of your face with your arm extended. Close one eye. Then close the other eye and your thumb appears to jump from one position to another even though you know it hasn’t moved. What’s happening is the angle of view from one eye to the other changes the background that is visible giving the the appearance of movement.
When your camera does this blending images together becomes very difficult and weird things happen in stitching. This anomaly is more apparent when you have something that is relatively close to the camera. When the pivot point is not over the light entry point. If the panorama subject is further away and you have nothing in the foreground your software has less of a problem with the stitching which is why you can get away with it sometimes and not others.
Panorama head kits
There are specific panorama heads for getting your camera. You can spend from just under a hundred bucks to well over $700. Ask yourself, “How much am I going to produce this type of work?” If it’s a LOT and you need super accuracy then you’ll want to spend the higher dollar amount and buy the higher quality materials. If you are willing to work a little harder and McGyver your way to a result then you’ve come to the correct blog post.
Frugal person’s panorama kit
If you are working with a wide angle lens you can get away with a few bits and pieces. A 120mm quick release plate, $10.99. https://amzn.to/3HgutFS If you want to work with longer lenses a 150mm or longer plate will be useful $15.59. https://amzn.to/3QSL59Y Arca Swiss clamp $24.95. Arca Swiss ‘L’ bracket, $19.95. https://amzn.to/3XFkZJN I use Peak Design camera straps so that I can quickly remove or replace the strap when working on a tripod. Not necessary, but I find it much easier than trying to wrap the strap. https://amzn.to/3XKjjOX. If you would like to do multi row panoramas you will need to tilt the camera while staying over the LEP.
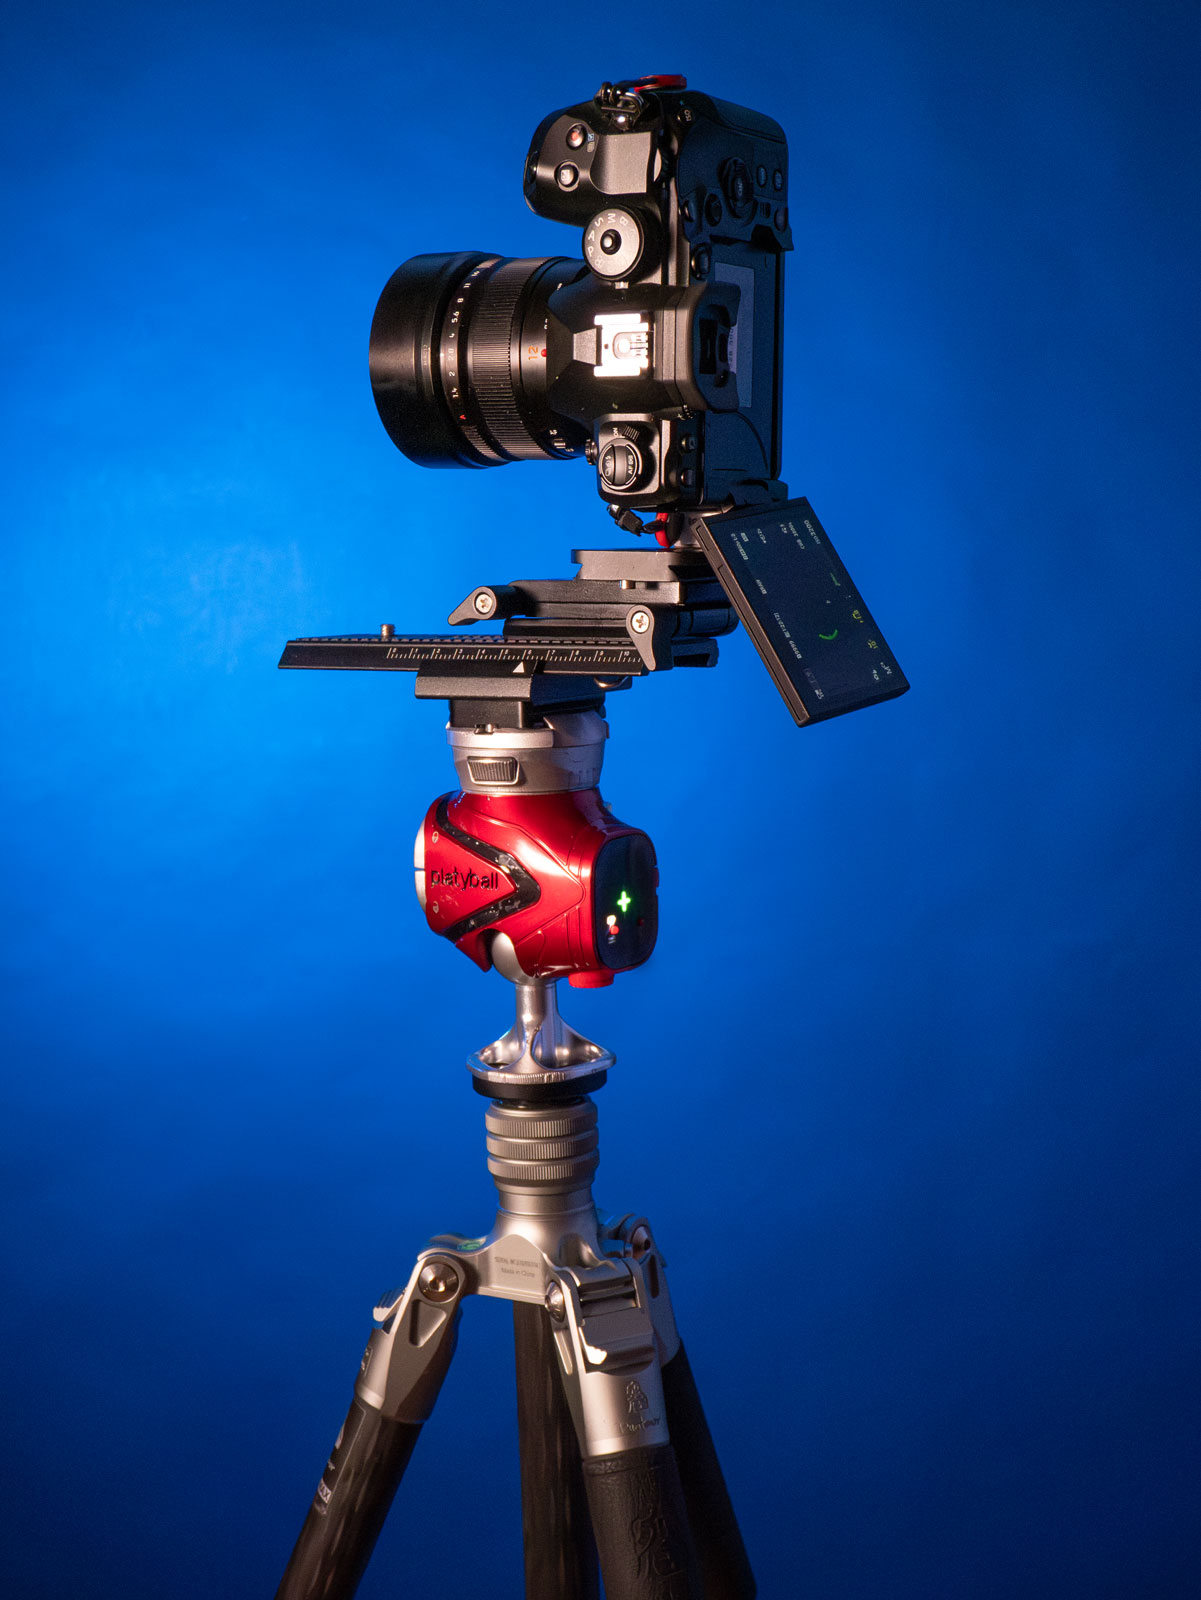
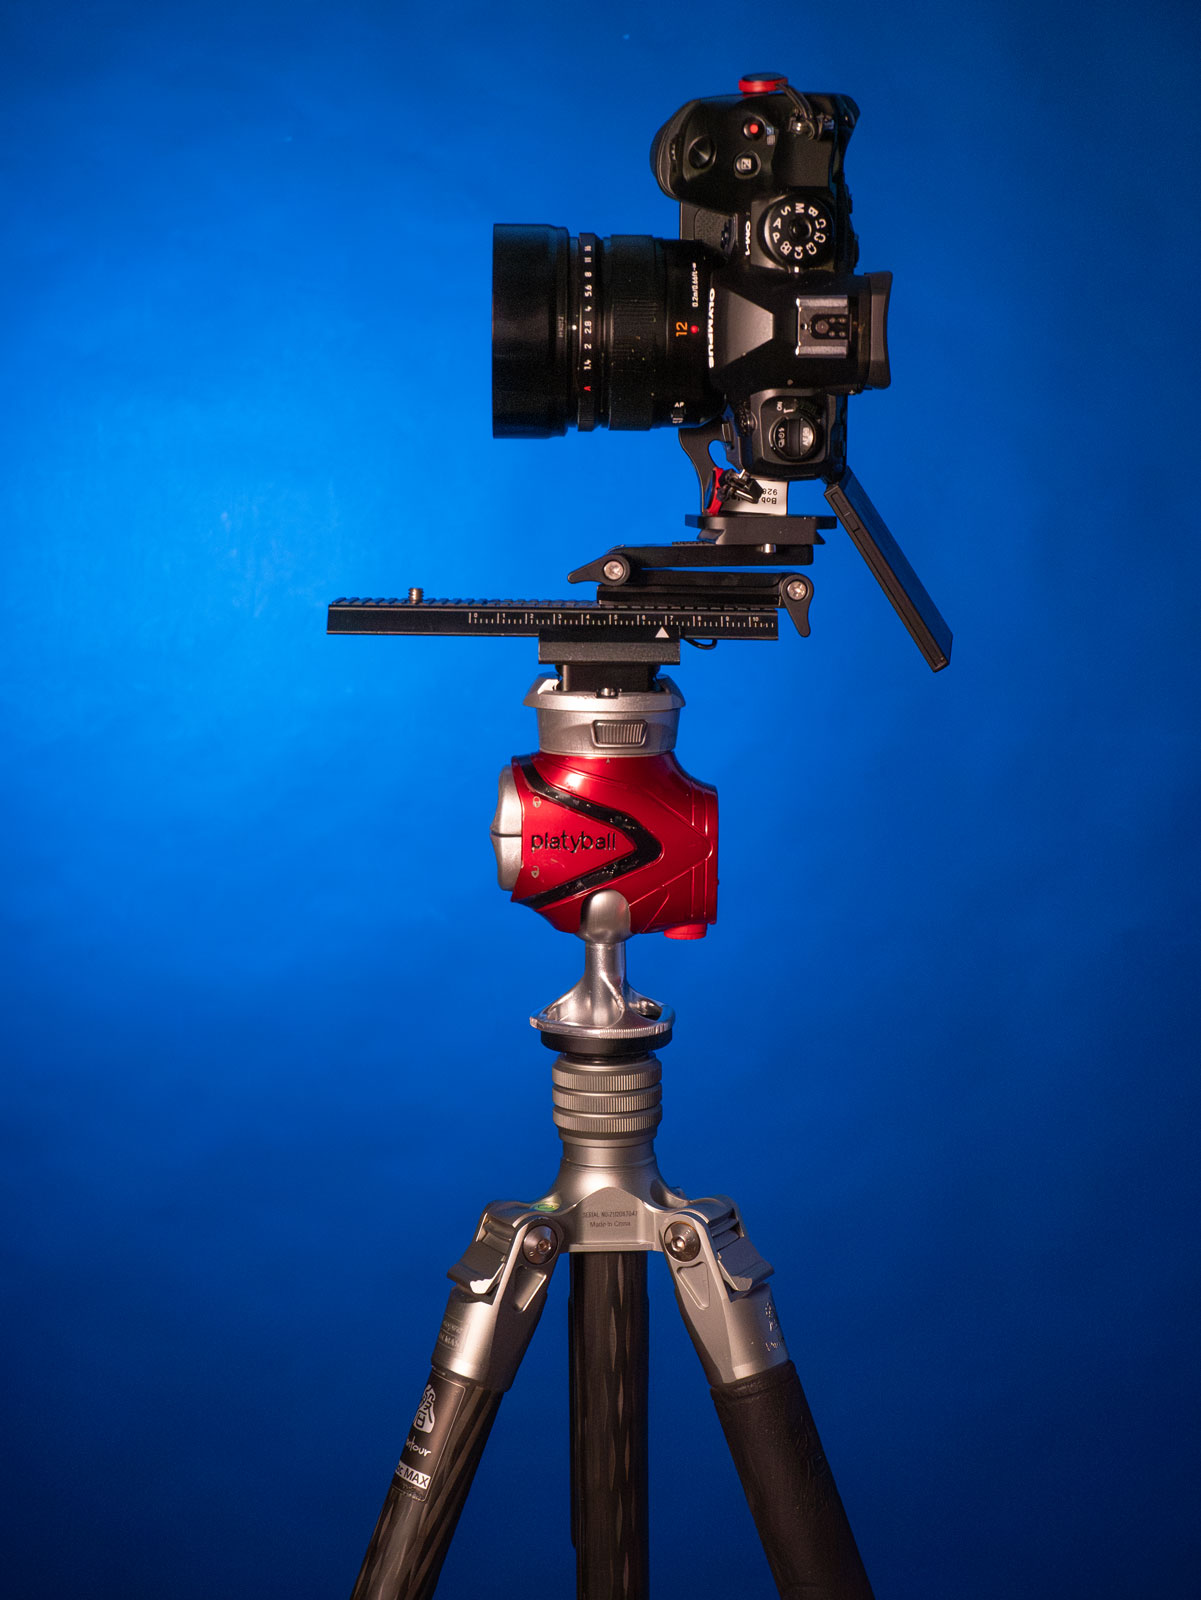
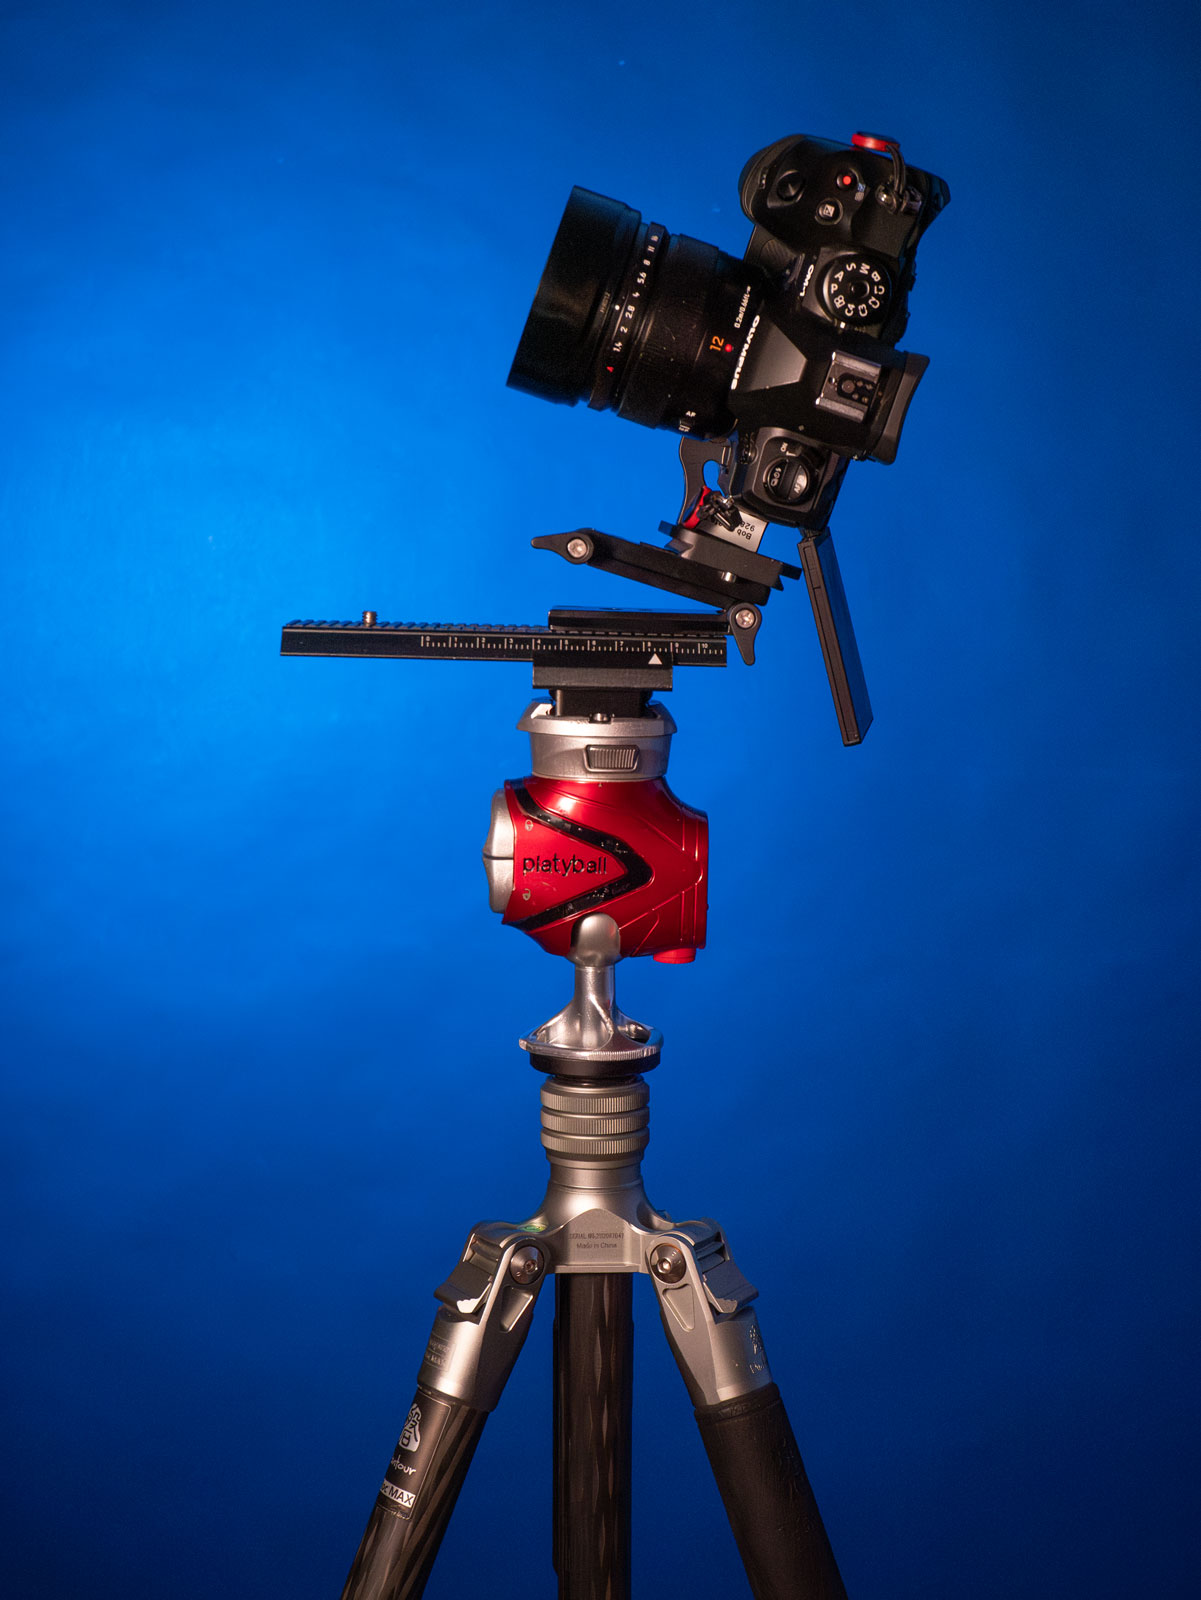
The Platyball Elite has a built in level. When it’s level and the camera is level you can use the built in rotation to pivot the camera and it stays level from one side to the other.I have the Platyball mounted on a Fotopro carbon fiber tripod. The macro rail allows you to easily dial in the LEP over the pivot point for clean panorama stitches.The tilt plate allows for multiple row panoramas. Note: With this set up you need to move the camera forward a few notches to maintain the LEP. The macro rail makes that a piece of cake.
If you want to get a little more advanced with the poor man’s panorama set up shown above check out these items. Six inch sliding macro rail, https://amzn.to/3xYMtmh. Universal Flex Tilt Head Z Mount Bracket, https://amzn.to/4eTg6WQ.
finding the light entry point
Here is one way to find the light entry point. Make it so your camera can move forward and backward on your tripod. You can either add a macro focus rail or buy a long Arca Swiss plate. (see above) In order to really understand the changes happening due to the lens position I recommend you perform these tests for yourself.
This illustrates the light entry point after testing with the method shown below. Notice that even on a wide angle lens the entrance pupil is forward of the camera body.
Set up a couple light stands. One about six feet in front of your camera. The other at least 15-20 feet away. If you have a small space you can use the corner of the room for your second vertical or move outside like I did so you couldn’t see my messy studio. In order to better see the results I wrapped and taped a piece of paper on the further light stand.
Place the camera over the tripod pivot point, where it would normally sit without the longer plate. Line up the two verticals in the center of your frame. Make an image. Pivot the camera so the foreground light stand is on the right side of the frame. Grab a frame. Move the camera to the left side of the frame. Repeat photographing on each side.
Next, slide the camera backward so the front of the lens is closer over the pivot point. Make the same exposures. Note the difference. You may have to repeat several times moving the camera forward and back until you get it just so. Repeat the process until the further light stand or vertical reference is always covered by the front light stand. Note or mark the lens where the pivot point is for future reference.
Trying out something new. I’ve signed on to Dot.cards and added my contact information. This is the easiest way to share all my contact stuff to your phone. Scan the QR code and you’ll have links to my commercial, art and photographers websites plus my email and phone number. Pretty cool right?
Scan the code to download all my contact info to your phone.
If you are interested in using this service yourself you can learn more here. https://dot.cards/signup
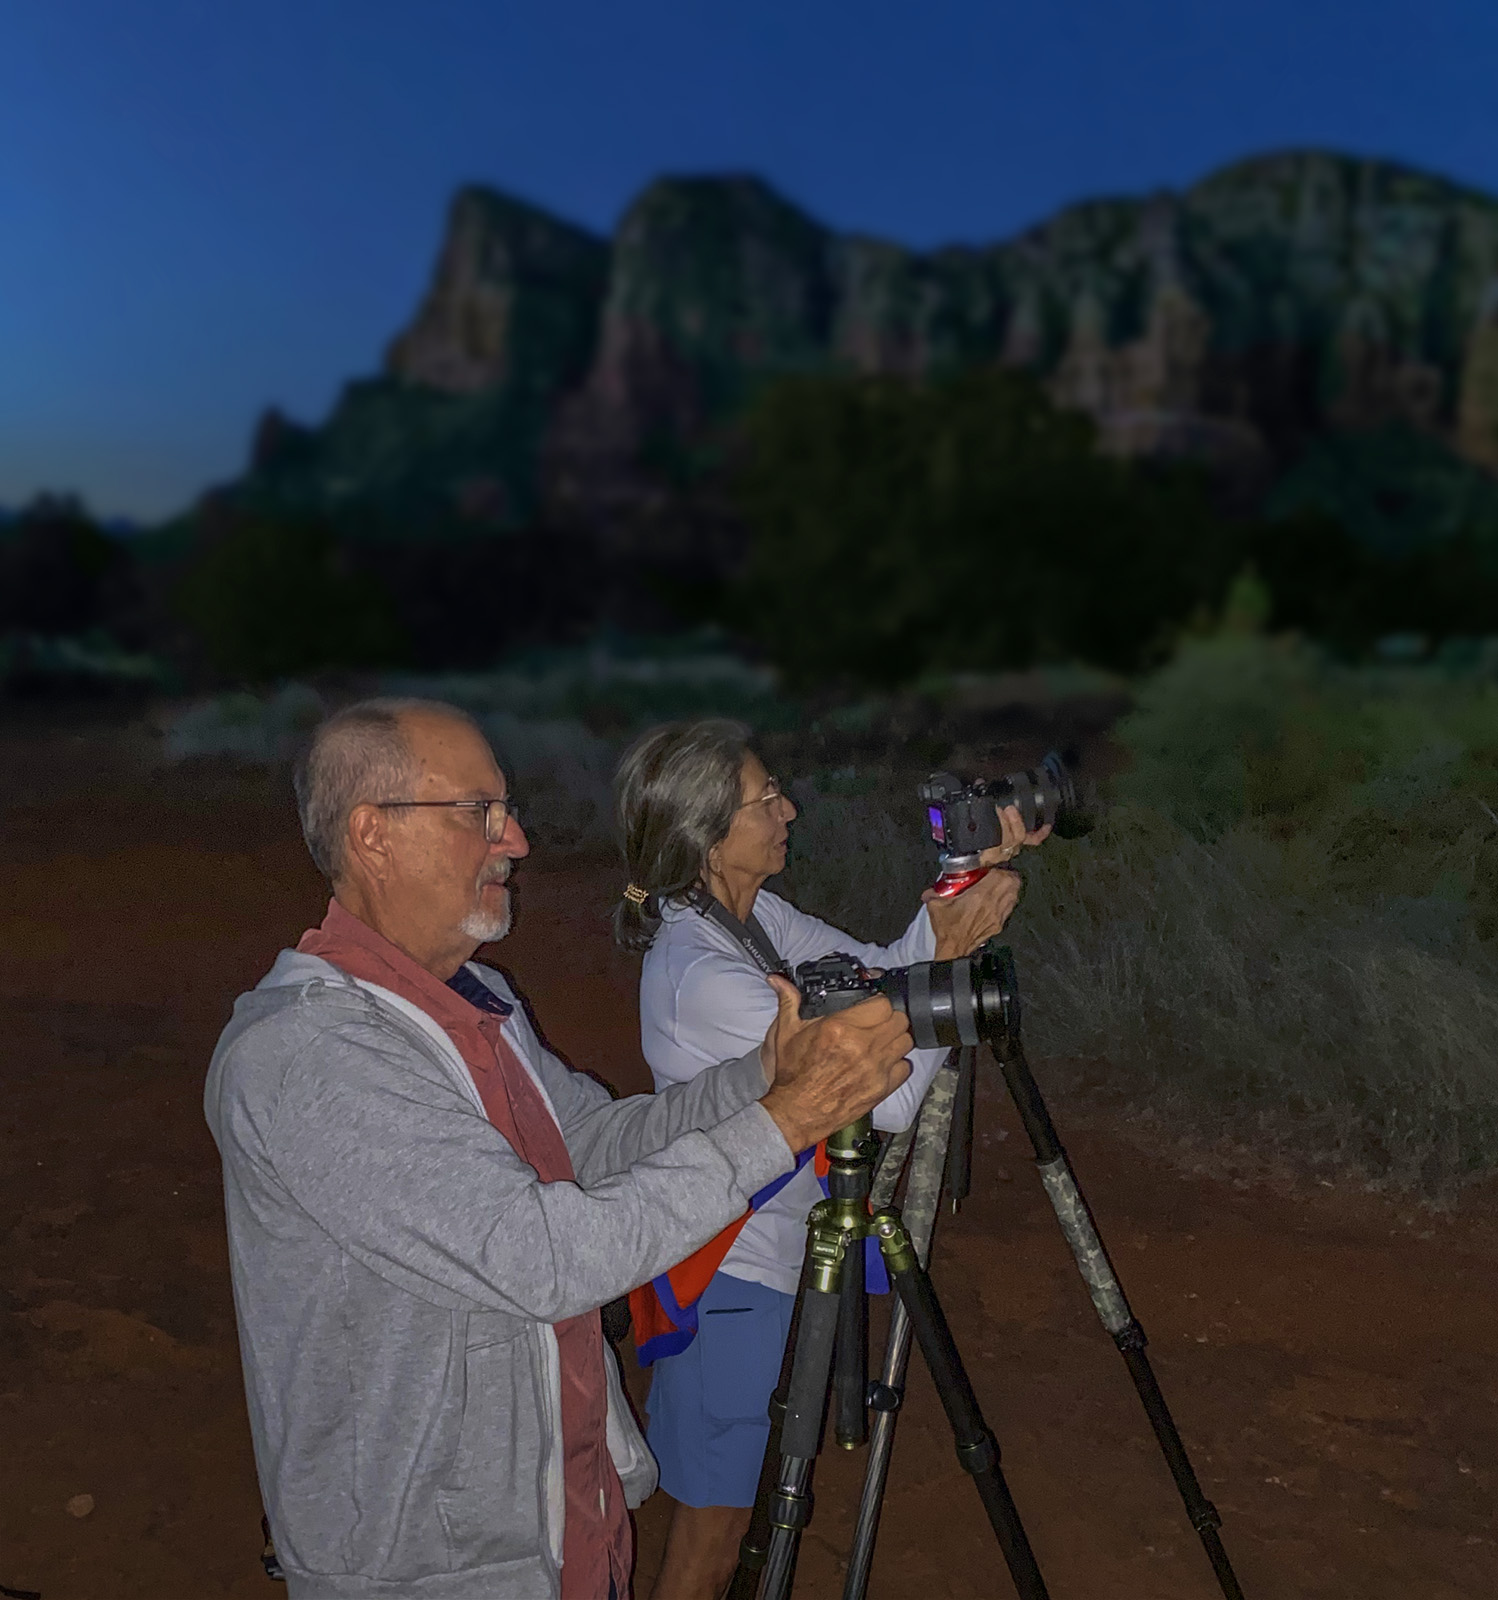
Had a blast with my last couple at the Milky Way and Night Sky Photo Workshop here in Sedona. We had two clear nights with the Milky Way making an appearance both times. It was a test run to see how the class would go.
Here’s feedback from June workshop attendees Cindy and Paul…
“Bob,
Thanks for the resource page, I’m sure Paul and I will use it many times. We thoroughly enjoyed the class and learned quite a bit during the few days we were there.
Here are my thoughts on the class: The Milky Way and Night Sky Workshop was very useful and enjoyable. Things we learned included planning, star stacking, focusing technique, and composition.
You were knowledgeable on different cameras and helpful finding needed camera settings for our cameras.
Holding the course in the red rocks area of Arizona provided an excellent opportunity to implement all the techniques learned. I now feel confident in shooting the Milky Way and highly recommend the Bob Coates MW Photography Course.
Thanks again and take care.” Cindy
Paul and Cindy getting set up for the Blue Hour capture. Check comments on the class from Cindy above.
The four hours of instruction on the first day is just about right to cover all of the shooting and camera setup bases.
Dinner was great at Sound Bites Grill. SBG set up a limited, but extremely varied menu for my workshop guests. We even had live music. Then it was off to hike to the Milky Way location with time to scout out foregrounds and practice with the PhotoPills APP.
Day two was downloading and processing images from the night before and answering questions that popped up from the previous night’s shoot. Five hours in the classroom was plenty. Break time and dinner on our own meeting for night two of night sky photography. Off to bed and then an early morning session with extra Photoshop processing and answering final questions.
New dates have been posted on the Milky Way Workshop page. Take a look and let me know which dates work best for you.
It’s official I’m cleared to teach my Milky Way and Night Sky Photo Workshops. I’ll be your instructor in the classroom and your guide on the Coconino National Forest. Had to go through a number of things to become an approved temporary guide. One of those things was to renew my First Aid Certificate. I thought, ‘Man I’m pretty cool with First Aid.’ And I was but the review was a solid brush up on CPR and emergency procedures.
Join me
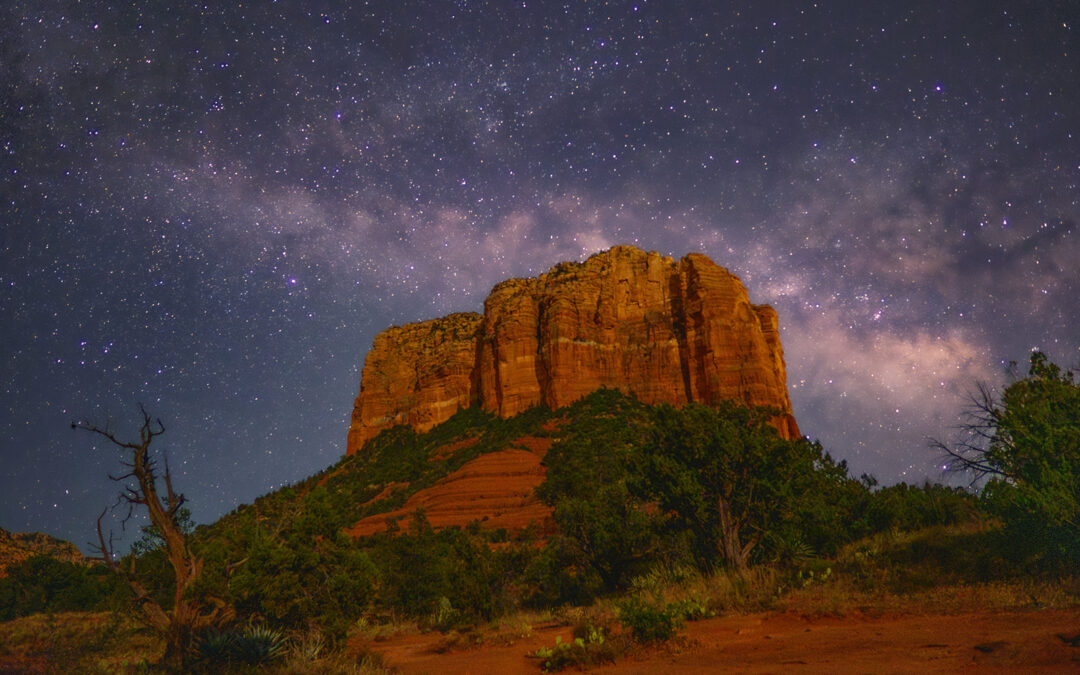
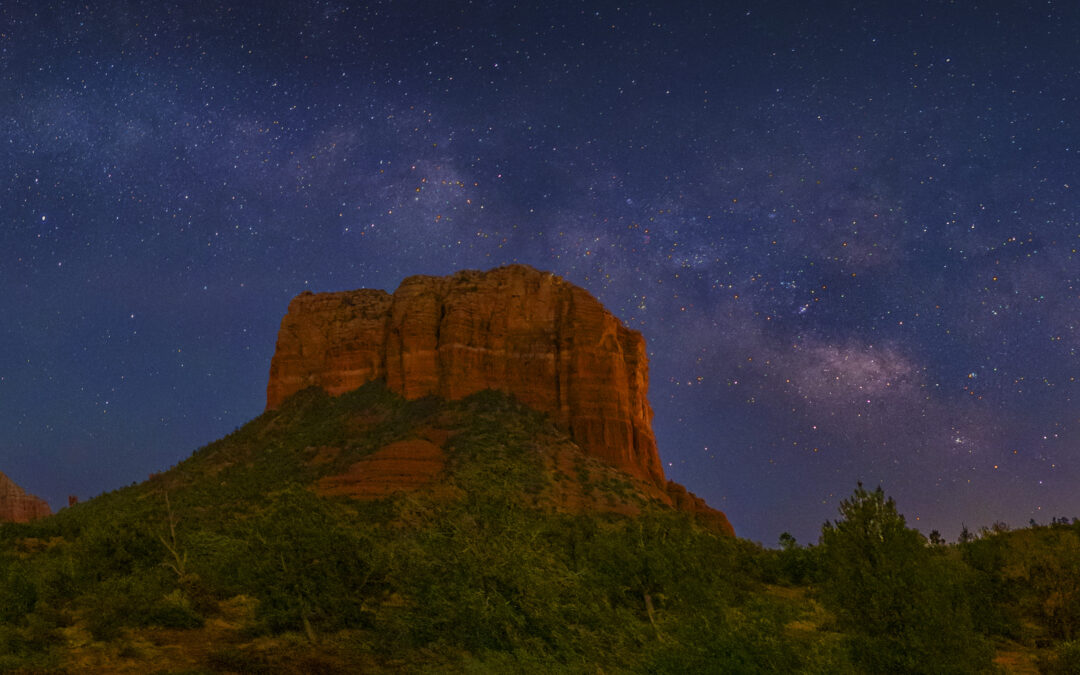
I’d like to have you join me for some time under the Bortle Four starry skies of Sedona, Arizona learning techniques to capture and process your files of the Milky Way, star trails and more in among the red rocks. Learn about the Bortle Skies scale.
Milky Way in Sedona, Arizona
More information
Get in touch with me for a special discount for the June 21-23, 2023 Milky Way and Night Sky Photography Workshop. Learn more about the workshop.
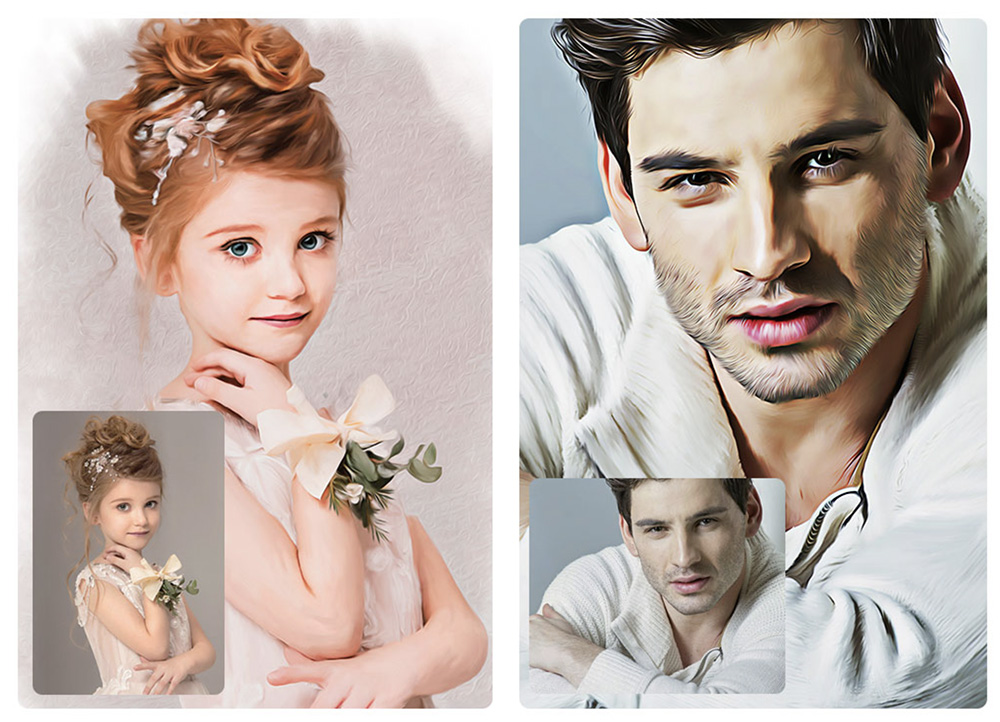
Here’s a watercolor action. I find they are a great starting place for working on the next level of your images.
Webinar with Gavin Phillips
I’ll be teaming up with UK photographer Gavin Phillips to share a Photoshop webinar on artistic Photoshop plug-ins that he has designed for creating watercolors and paintings from your photographs. When you sign up for the webinar you’ll get two backgrounds as a bonus. If you can’t make the live event you’ll be able to view the recorded version. Learn more and sign up here. photoeffects.bz/webinar.html
Oil paint Photoshop action designed by Gavin Phillips.
April 5th 2023
Even if you can’t make the live event you get a link to watch the webinar at your leisure. Hope you can join us on April 5th at 11AM pacific and 2PM eastern time. If you have any questions give me a shout or drop me an IM.
You probably know I am a Platypod Ambassador. But in addition I am a Platypod fan. I originally bought one of the first Platypod Ultras. Used it a few times then forgot about it. I broke it back out, started looking for way in which to use it and found a lot.
Since the release and design of the Ultra Platypod has gone through some great improvements and lots of useful gear has been designed around it for for studio and location work. If you haven’t seen and worked with the Platypod products here’s a one minute video to help introduce you to all the ways Platypod can help your photography.
One minute with the Platypod line of gear. Take a peek. You’ll probably run into some creative ways to use the gear that you never thought to use.
This is a powerful LED light that’s solid for studio work and light enough to take on location. I appreciate the Color Rendering Index is a high 96 for clean color with no shifts. It produces lots of light 230 watts. It’s easier to show you how this light works than to write about it, so I invite you to check it out. See what I like, a lot, and a small issue or two to watch for…
Review LED Light – Godox LA200 Single color 5600k. Godox also makes a LA150 and bi-color versions.
If you have any comments or questions about this review let me know. BTW, I was able to keep this LED Light at no charge.
For infrared conversion of my cameras I use LifePixel. Infrared allows you to put an older camera to use and opens up a new time time of day for productive image creation.
Learn Photoshop in a fun environment. Aaron Nace applies the right amount of fun with easy to understand and follow tutorials. Actions and brushes are included with lessons!
Best embroidery ever. Give Queensboro a try, get a $20 instant credit to get started by clicking on the logo! They specialize in great quality custom logo apparel and promotional products with the best customer service.
Platypod has become a great resource for being creative in getting your camera gear easily into unusual places. As an Platypod Pro I get to work/play with the gear even before it comes out. Head over to Platypod, subscribe to the newsletter and you will get special discounts reserved only for subscribers.